

How To Create A Logo In Illustrator Cs6
In this tutorial, you will learn how to create a logo in Adobe Illustrator.
To create our logo design we will combine a few simple shapes using some very simple linear gradients where we will try to increase the depth and to create an eye-catching design.
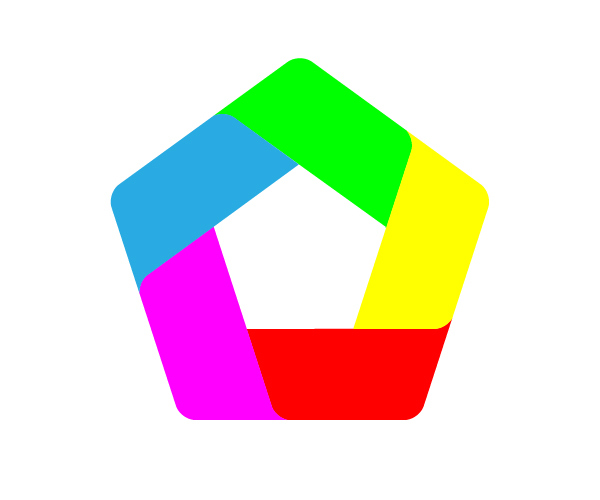
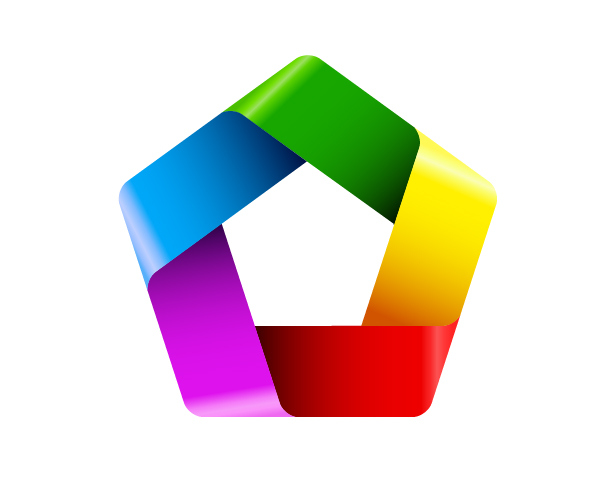
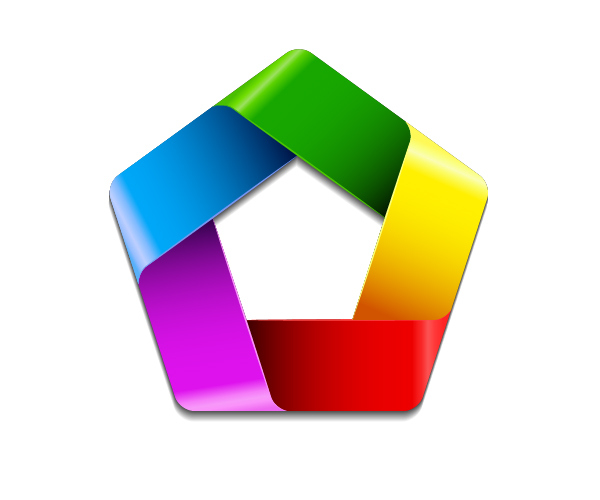
Final Image
As always, this is the final image that we'll be creating:

Tutorial Details
- Program: Adobe Illustrator CS5
- Estimated Completion Time: 45 minutes
- Difficulty: Beginner-Intermediate
Step 1
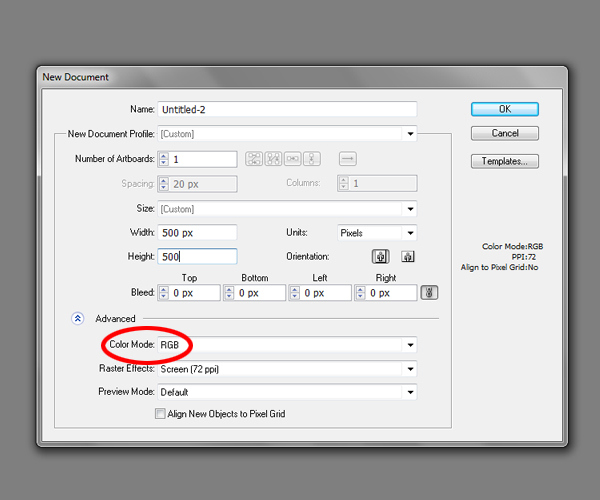
Let's create a new document first. Make sure to set the dimensions to 500 x 500 pixels and the Color Mode to RGB.
Step 2
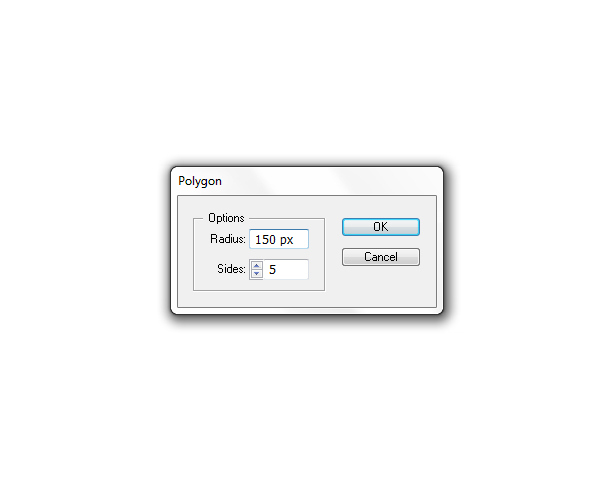
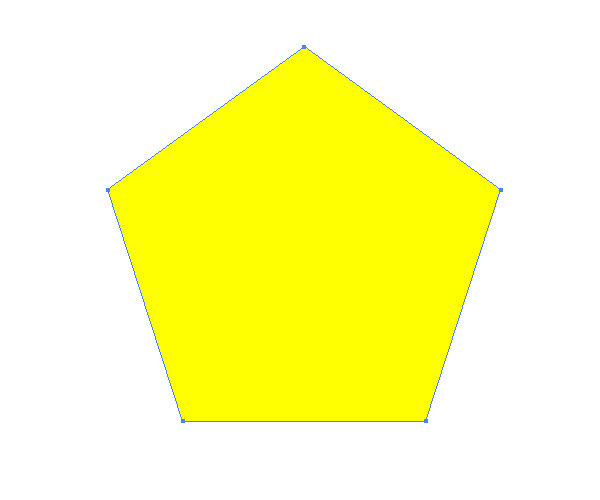
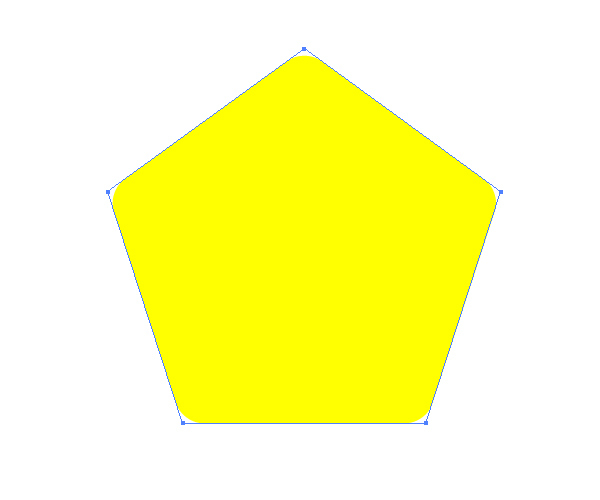
We will start with the Polygon Tool. Select it in the Tools Panel and click on the Artboard. It will bring up the Polygon Option box. Set the Radius to 150 pixels and Sides to 5 and hit the OK button. Fill color is not important.
Step 3
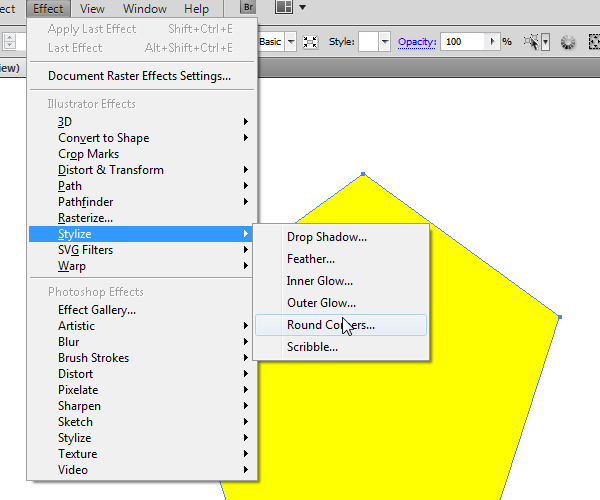
We need to modify our Polygon a little. Select the yellow shape and under Effect select Stylize > Round Corners.
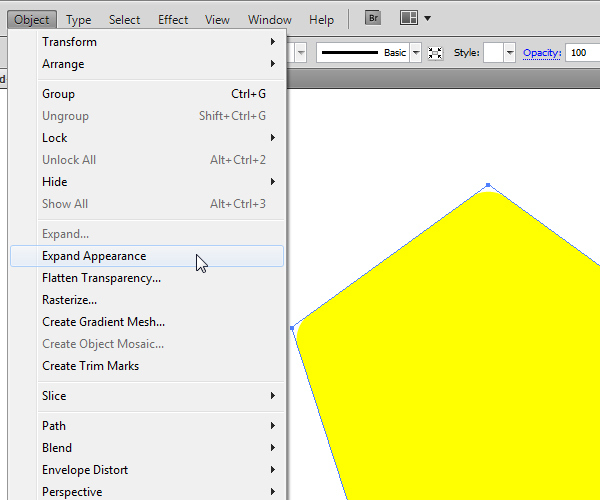
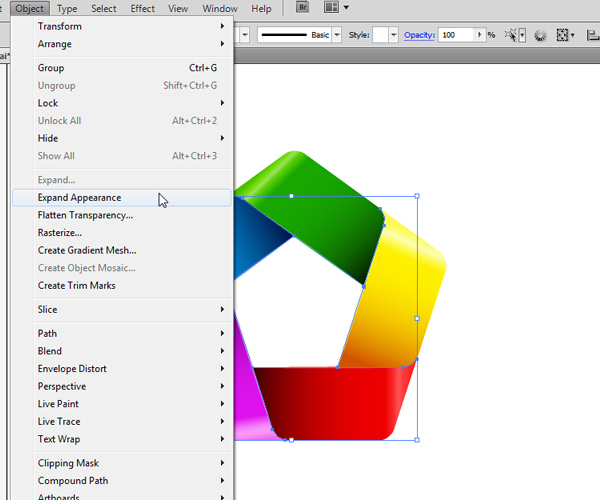
Step 4
Make sure to expand the shape. Select Object > Expand Appearance. It will turn the object into an editable shape.
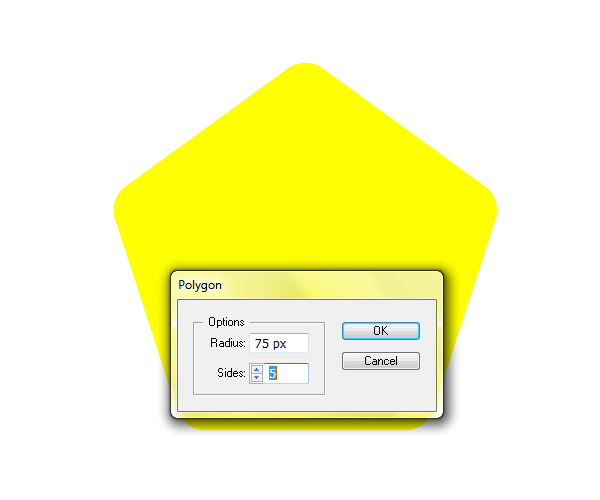
Step 5
Next thing we have to do is to create the "hole" in our modified pentagon.For that, we will use the Polygon Tool again. Grab it from the Tools Panel and click on the Artboard to bring up the Polygon Options Box. Set the parameters as shown in the picture below and hit the OK button.
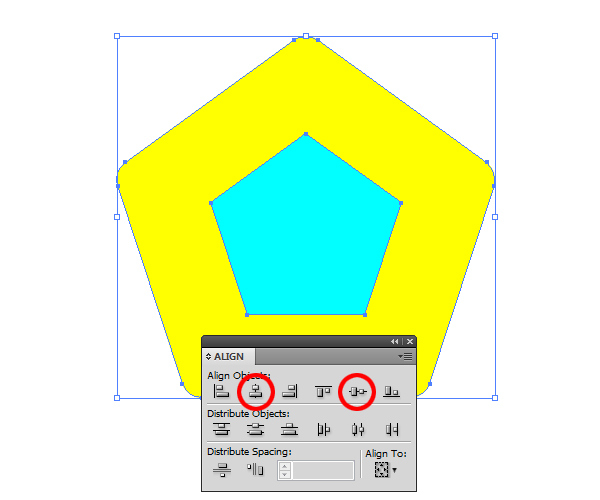
Step 6
Make sure to align both shapes. Select them and under the Align Panel hit both, Horizontal and Vertical Align Center.
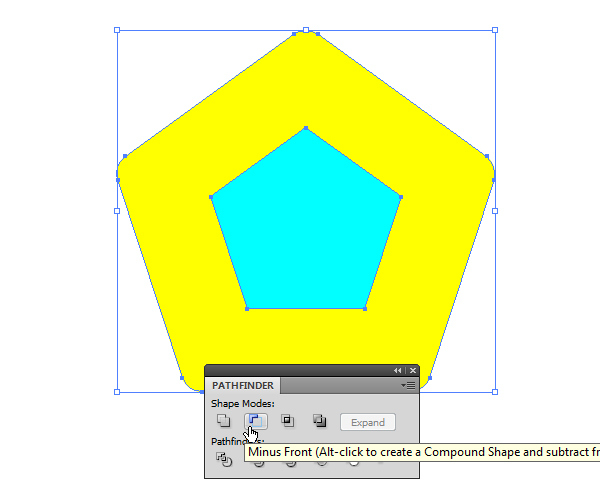
Step 7
Now we need to create a "hole" in our Polygon. Select both shapes and under the Pathfinder Panel hit the Minus Front button. It will cut out the middle part of the Polygon.
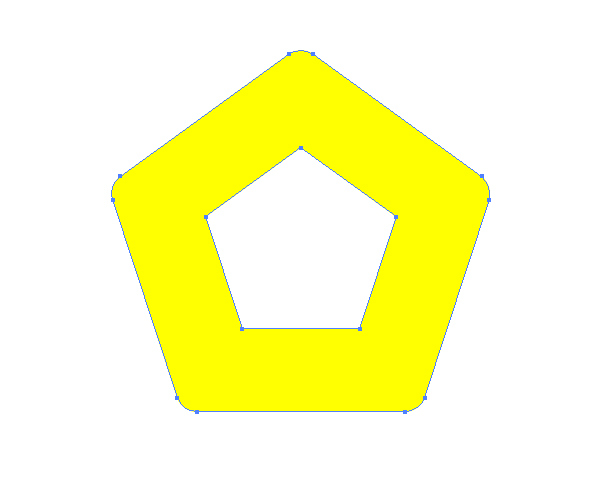
You should end up with something like this.
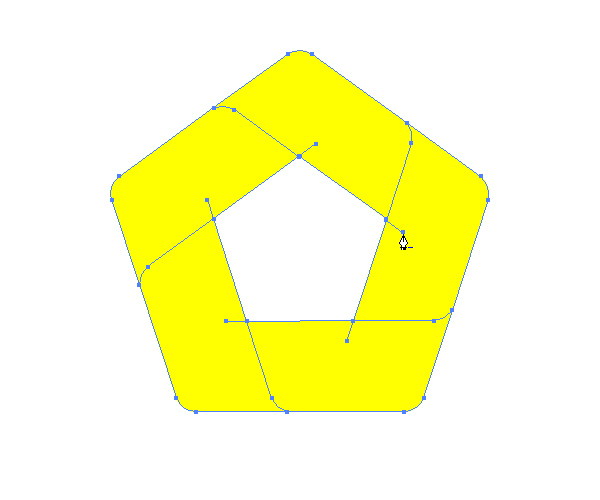
Step 8
In this step, we will try to create specific ribbons that will constitute our logo. To do that we need to divide the shape we have just created into 5 parts. One of the possible ways to do that is to create certain paths by using the Pen Tool (P). Since some people have difficulties with this tool we will try to avoid it by using a small trick.
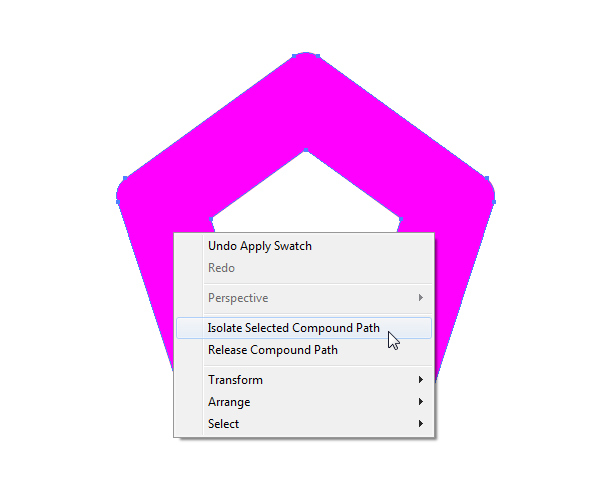
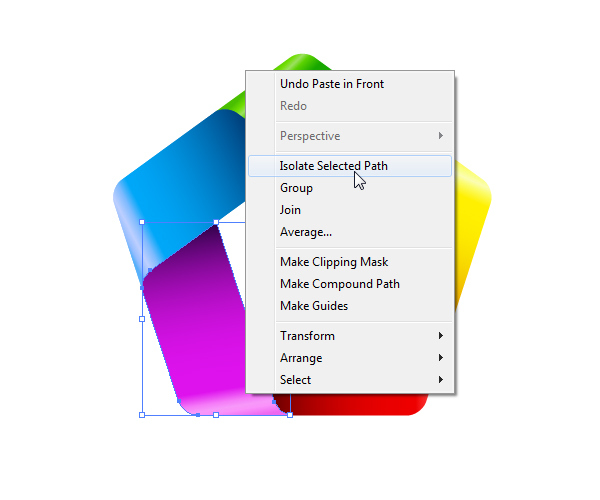
Duplicate (Ctrl / Cmd + C, Ctrl / Cmd + F) the yellow shape and change the Fill color of the copy. Under right click select Isolate Selected Compound Path. This way we will be able to modify the pink shape without messing up the rest of our design.
Step 9
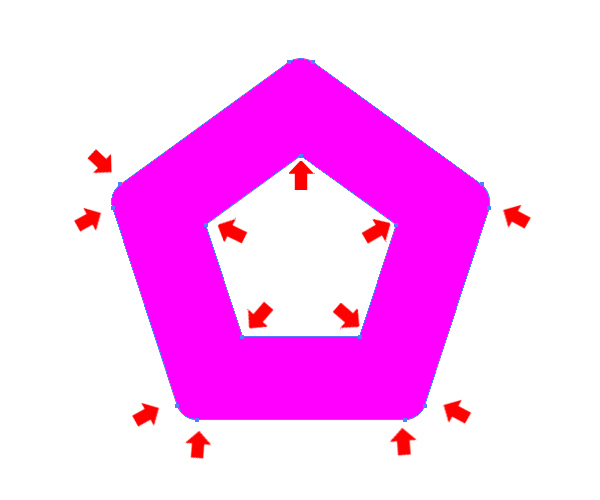
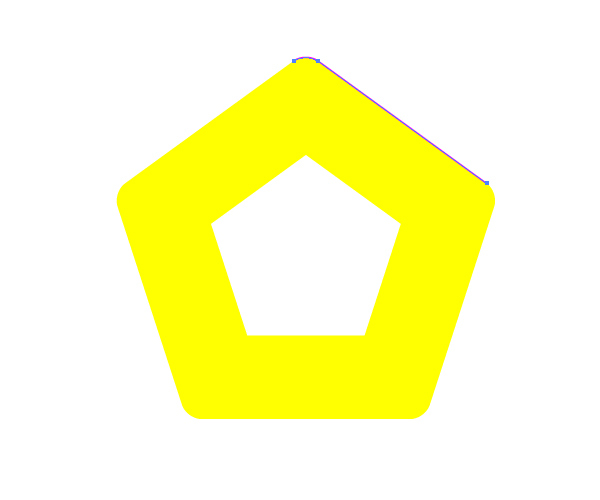
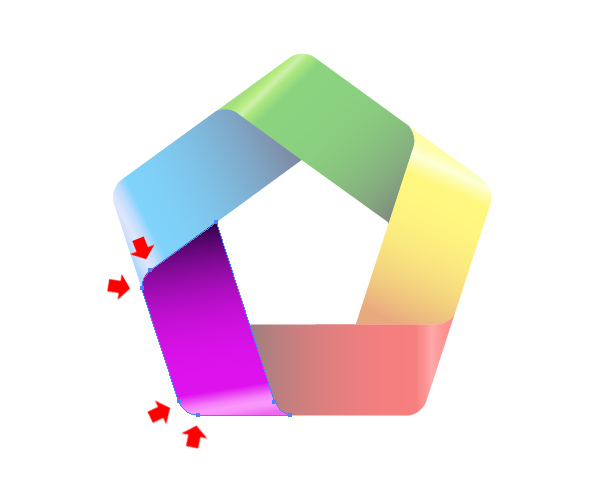
Select the Direct Selection Tool (A) from the Tools Panel, select and remove (by hitting the Delete key on your keyboard) anchor points as shown in the picture below.
Step 10
Remove the Fill color and set the Stroke color to any color you want. You should end up with a single path with a curved edge, just as shown in the picture below.
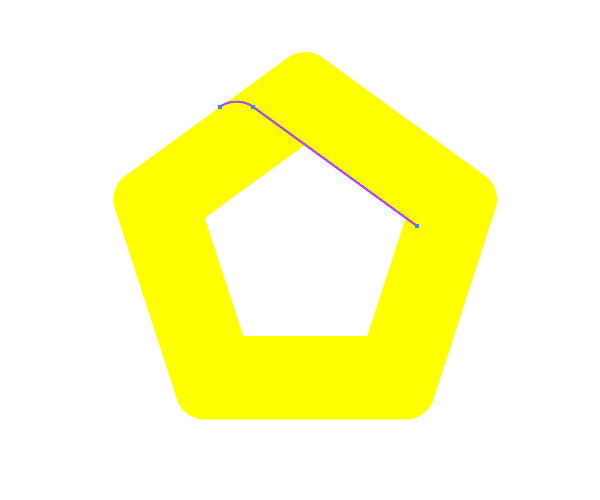
Step 11
Grab the Selection Tool (V) from the Tools Panel and move the path we have just created as shown in the picture below. You can also zoom that part of the illustration by selecting the Zoom Tool (Z) from the Tools Panel. This way you'll be able to place the path at the right spot.
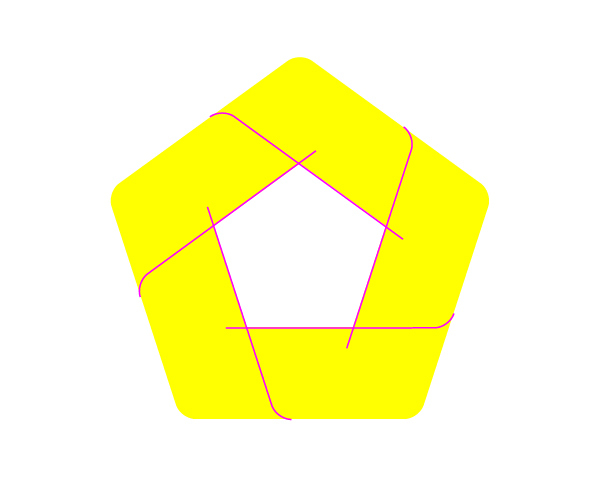
Step 12
We are going to repeat the previous step in order to create four more paths. In the end, you should have something like this.
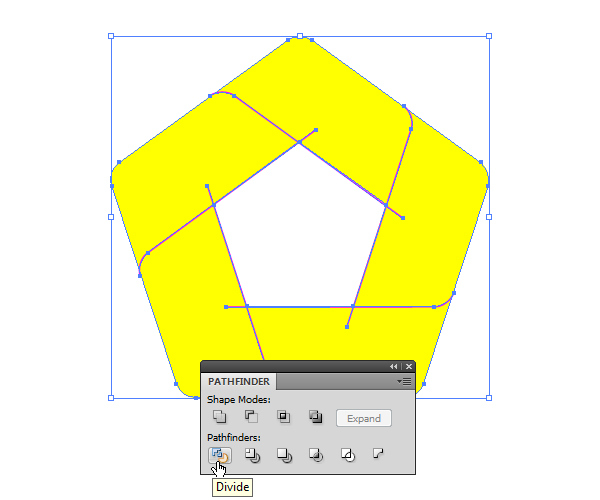
Step 13
Select all elements we have created so far and under the Pathfinder Panel hit the Divide button. It will divide our yellow shape into 5 stripes that we will turn into nice colorful ribbons very soon.
Step 14
Ungroup (Shift + Ctrl / Cmd + G) the shape we have just created. If there are any small particles created by the imperfect positioning of elements make sure to remove them. Also, you should remove all unwanted anchor points by using the Delete Anchor Point Tool (-).
You should end up with something like this.
Step 15
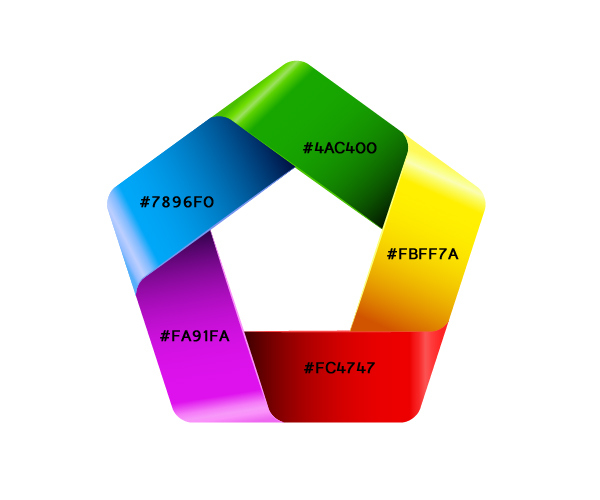
Our logo is now ready to get some nice color gradients. We will be using only linear color gradients. Keep in mind that the angle of the drawn gradient is very important. So let's get started.
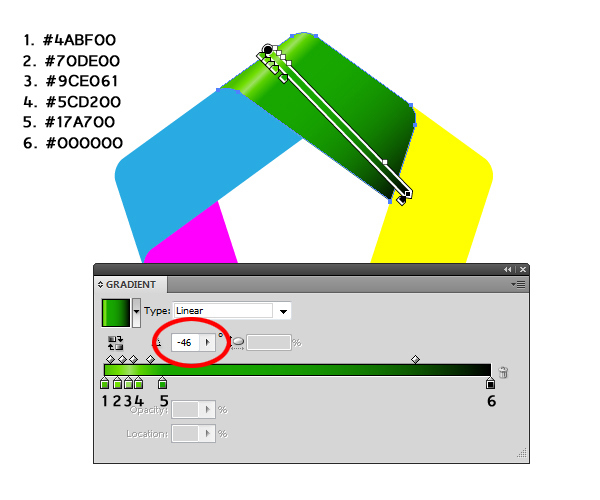
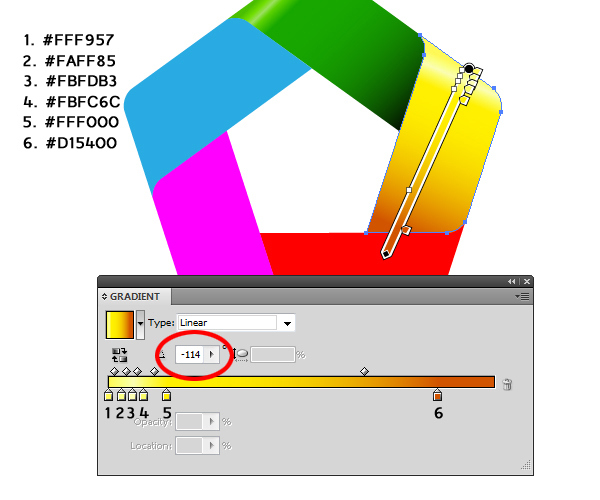
You should end up with something like this.
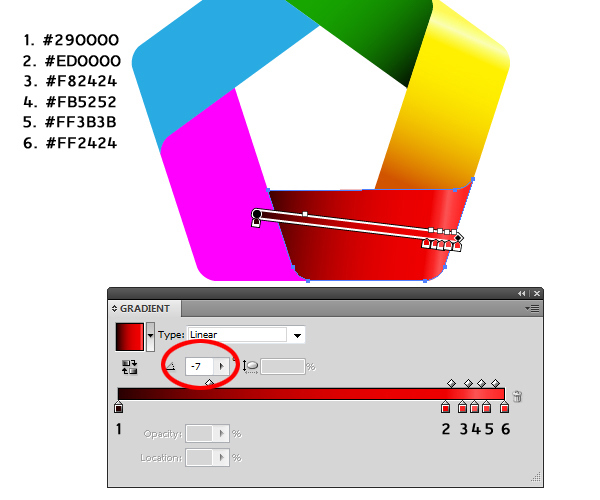
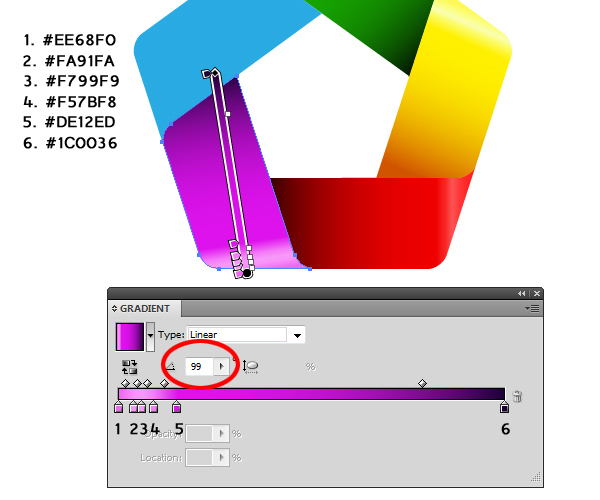
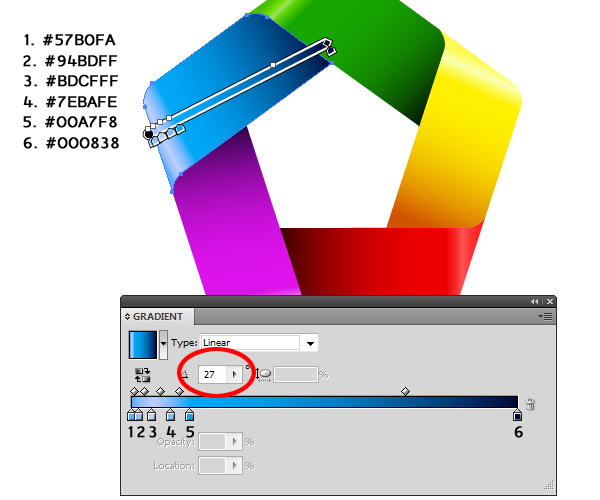
Step 16
Now we are going to emphasize the edges. To do that we are going to use a similar technique we have used few steps earlier when we created paths to divide yellow shape.
We will duplicate (Ctrl / Cmd + C, Ctrl / Cmd + F) each of the five sides of the logo. With the Direct Selection Tool (A) select all the anchor points we don't need and remove them by hitting the Delete key on the keyboard (To be sure not to mess up the rest of the illustration enter the Isolate Selected Path mode. You will find it under the right click). Basically, the idea is to end up with the straight path on the inside edge of the logo.
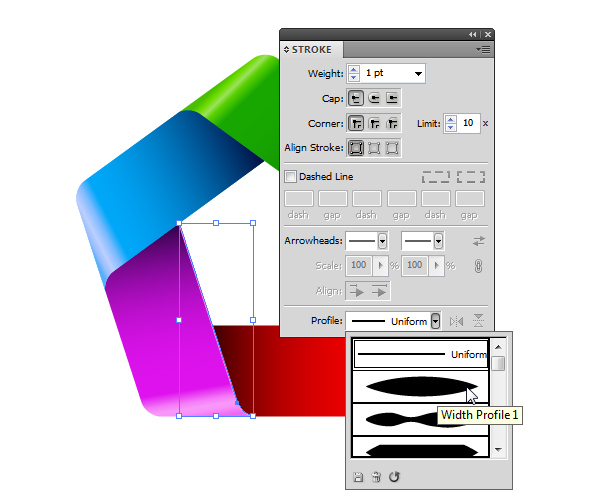
Step 17
Remove the Fill color and set the Stroke color to #FA91FA. We will set the Stroke Width to 1 pixel, but you can adjust it how you like. Just make sure to set the Profile to Width Profile 1.
Step 18
Repeat the previous step for the other four sides of the logo as well. You should end up with something like this.
Make sure to turn paths into editable shapes by selecting Object > Expand Appearance.
Step 19
In this step, we will create a nice soft shadow for our logo. We will be using the Blend Tool to achieve that.
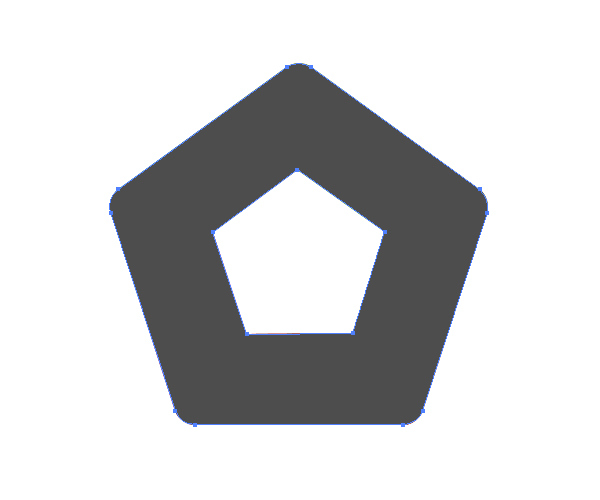
First we will select all the elements we have created so far and duplicate them (Ctrl / Cmd + C, Ctrl / Cmd / Cmd + F). Under the Pathfinder Panel hit the Unite button. It will unite all elements into one shape placed on the same spot as our logo, perfectly centered.
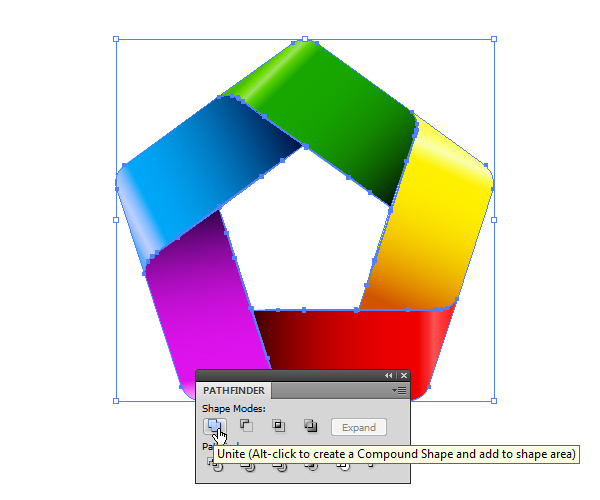
Make sure to set the Fill color for the new shape to gray (#666666).
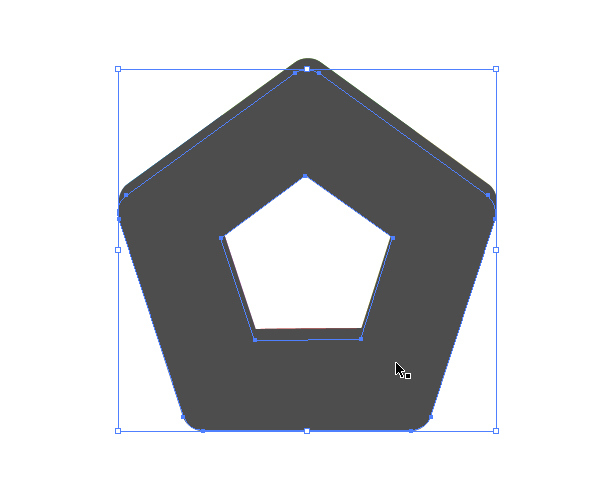
Step 20
Holding the Alt / Opt key on your keyboard click on the gray shape and drag it downwards. It will create a copy of the gray shape. Make sure to hold the Shift key on your keyboard for straight dragging.
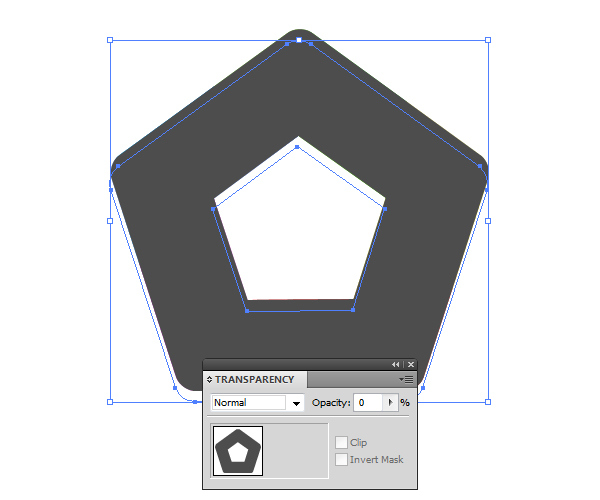
Step 21
Set the Opacity for the new shape to 0%.
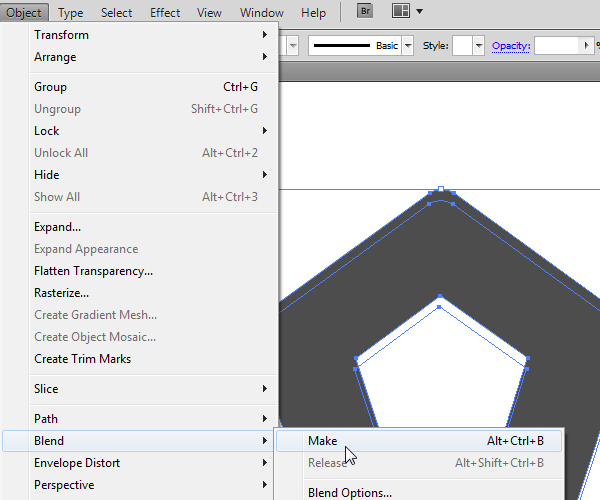
Step 22
Make sure to place the gray shape with full Opacity on the top ( Shift + Ctrl / Cmd + ] ). Select both shapes and under the Object select Blend > Make.
Step 23
Select Object > Blend > Blend Options. Set the Spacing to Specified Steps and the value to 30. It will create 30 new shapes in between which will look like a smooth transition from one shape to another.
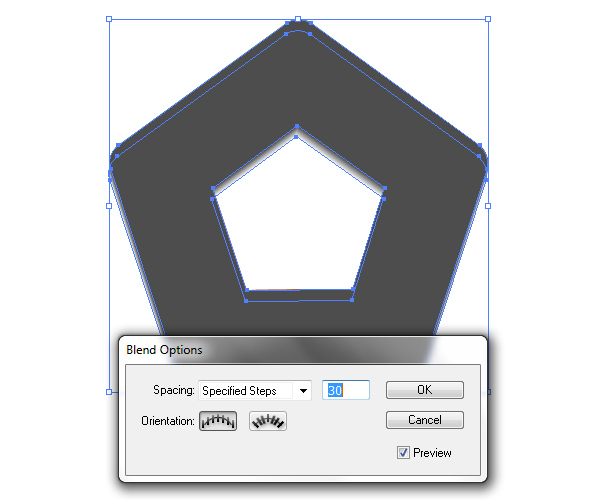
You should end up with something like this.

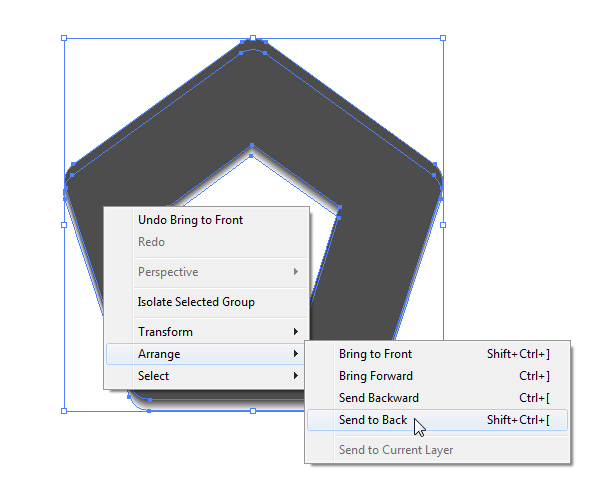
Step 24
Make sure to place the shape we have just created underneath our logo design ( Shift + Ctrl / Cmd + [ ).
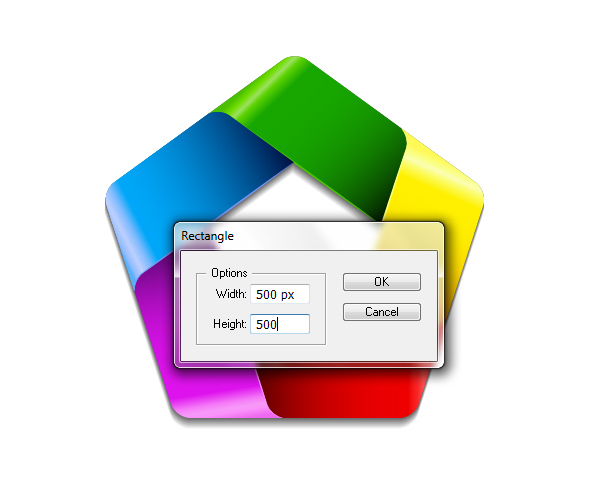
Step 25
Let's set a nice background for our final design. Grab the Rectangle Tool (M) from the Tools Panel and click somewhere on the Artboard. The Rectangle Options box will pop up. Set the dimensions to 500 x 500 pixels.
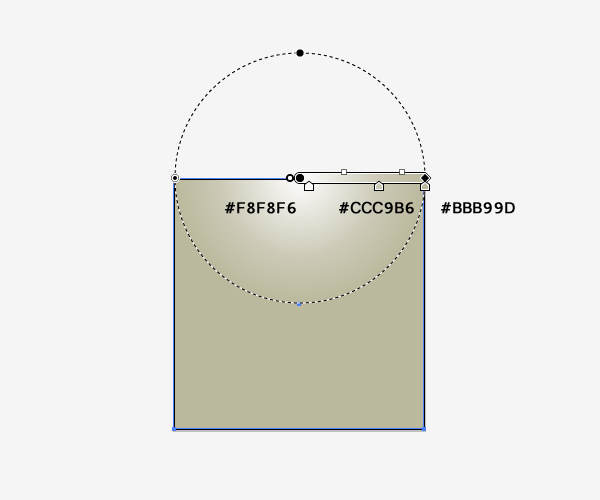
Step 26
Apply nice radial gradient as shown in the picture below.
And We're Done!
Place the background underneath our logo design, adjust the size of the shadow that the logo casts on the background and voila!
This time we did something more colorful than usual. Also, during the creation process, we have learned how to use things we already have in order to create something new.
I encourage you to play around with shapes and colors, you might end up with an amazing design. Just explore all possibilities that Adobe Illustrator offers so you can make your own logos.
How To Create A Logo In Illustrator Cs6
Source: https://vectorcove.com/how-create-logo-adobe-illustrator/
Posted by: adkinscomay1980.blogspot.com
0 Response to "How To Create A Logo In Illustrator Cs6"
Post a Comment